Ram Heavy Duty Forum

Register a free account today to become a member! Once signed in, you'll be able to participate on this site by adding your own topics and posts, as well as connect with other members through your own private inbox!

4500 Camper/Jeep Hauler Build

gprguy

Well-Known Member
Joined
Apr 14, 2022
Messages
543
Reaction score
1,275
Location
Kitsap Peninsula, WA
Funny coincidence, I got one of those in the mail today too. They are shockingly small!
Glad to see they are clearing out the backlog. :) The new packaging is interesting too, very minimalistic.

I’m thinking about figuring out a way to mount them directly on top of a fan, to reduce any power reduction due to heat. They seem like they’d be pretty close fit for a 120mm.
Good idea. For my camper I put a fan behind my older Orion and I used this little controller to run it automatically.


jsalbre

Well-Known Member
Joined
Oct 29, 2019
Messages
2,576
Reaction score
3,289
Location
ID
Glad to see they are clearing out the backlog. :) The new packaging is interesting too, very minimalistic.


Good idea. For my camper I put a fan behind my older Orion and I used this little controller to run it automatically.

Nice thoughts on the controller. I wonder if I could design an adaptor to a fan, and get someone to 3D print it. Or break down and finally buy a 3D printer!
 

gprguy

Well-Known Member
Joined
Apr 14, 2022
Messages
543
Reaction score
1,275
Location
Kitsap Peninsula, WA
Nice thoughts on the controller. I wonder if I could design an adaptor to a fan, and get someone to 3D print it. Or break down and finally buy a 3D printer!
Probably would be pretty straightforward. The issue might be what temperature it needs to withstand - I know the XS is supposed to not get nearly as hot as the old Orions but I'm sure it still gets warm. Might need to be printed out of something besides normal PLA, like PETG or ABS. If it needs to be ABS you are supposed to use an enclosure due to the fumes. I haven't done anything with ABS yet but I do have access to an enclosed printer if needed...
 

jsalbre

Well-Known Member
Joined
Oct 29, 2019
Messages
2,576
Reaction score
3,289
Location
ID
Probably would be pretty straightforward. The issue might be what temperature it needs to withstand - I know the XS is supposed to not get nearly as hot as the old Orions but I'm sure it still gets warm. Might need to be printed out of something besides normal PLA, like PETG or ABS. If it needs to be ABS you are supposed to use an enclosure due to the fumes. I haven't done anything with ABS yet but I do have access to an enclosed printer if needed...
The manual says the back plate will never exceed 90C, so definitely pretty toasty. That said, the mounting feet of the Orion are plastic, so nothing it’s mounted to should ever see that high of a temperature. It looks like PTEG has a glass transition temp of between 80 and 100C, so it would probably be suitable.
 

gprguy

Well-Known Member
Joined
Apr 14, 2022
Messages
543
Reaction score
1,275
Location
Kitsap Peninsula, WA
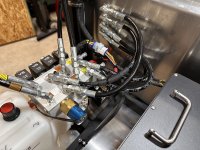
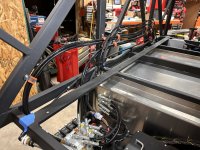
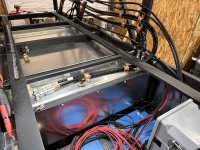
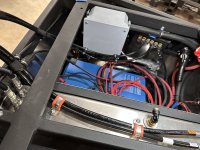
My folks are in town so not too much truck work going on, but my Dad and I found some time to finish up 99% of the plumbing - air and hydraulic.

IMG_6206.jpeg

IMG_6207.jpeg

IMG_6208.jpeg

IMG_6209.jpeg

The only plumbing left is the 3 short air lines on the driver's side, and those will just be in my way at this point. All of the cross box wiring (for now at least, I will probably run an AC outlet over there later) should be done as well. Other than a VE.Direct cable I suppose.

Next project will definitely be back to the aluminum skin and trim.
 

gprguy

Well-Known Member
Joined
Apr 14, 2022
Messages
543
Reaction score
1,275
Location
Kitsap Peninsula, WA
As promised, back to the aluminum. So naturally step 1 is - plastic?

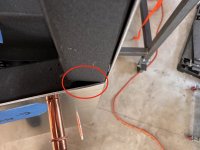
There's a design flaw with my frame, probably only one of many, but it has to do with how thin the front wall is (only 1"). I knew I had an unsolved problem as to how to deal with all of the angles but I ran out of ideas and figured I'd work it out later. Well later is now. There's this gap between the side panels and the square tube that makes up the front wall:
IMG_6193.jpeg

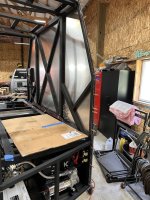
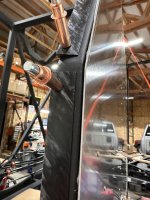
Might not look like much but I am concerned when I run rivets down the corner it will either pull in, or worse make a bad rivet/connection. Since I can't go back in time and make the front wall 2" thick like I should have with an extra angle to mount the skin to, I need to find something to fill the gap. After a lot of pondering I decided on Delrin since it machines/cuts well. I made a bunch of 13 degree angle 3/4" strips and here they are cleco'd in place.
IMG_6211.jpeg

IMG_6212.jpeg

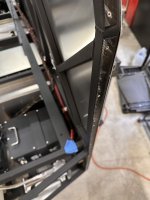
And with countersunk flat head rivets.
IMG_6213.jpeg

Now with that same panel back in place everything sits nicely.
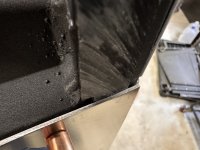
IMG_6214.jpeg

I need to repeat this on the driver's side, but I'm going to finish the passenger first. On to aluminum for real, building the remaining trim around the bottom.
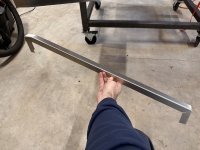
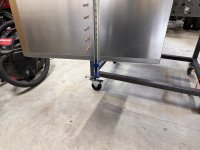
IMG_6215.jpeg

IMG_6216.jpeg

That's as far as I made it today, I need to drill for all the rivets next and then make yet more trim.
 

gprguy

Well-Known Member
Joined
Apr 14, 2022
Messages
543
Reaction score
1,275
Location
Kitsap Peninsula, WA
I appreciate it - it's taken a lifetime to get to this point, I still remember laying outside in the gravel under my first Jeep with my dad, shortening the t-case output shaft literally with an old Black & Decker circular saw we put an abrasive blade in. We managed to cut it straight-ish. Things have come a long ways since then..

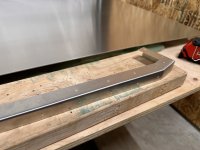
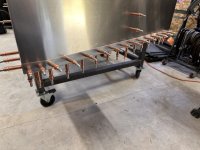
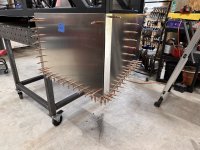
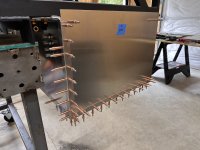
Couple of photos from last night, it's going to be several days of tedium making and fitting all the trim.

IMG_6217.jpeg

IMG_6218.jpeg

Might have to move the box off the table to get at some of the inside trim. Still figuring that out.
 

Brutal_HO

The Mad Irishman
Staff member
Joined
Feb 1, 2020
Messages
12,158
Reaction score
21,749
Location
Douglas County, CO
1*3RStda7-osT2a2KdHfmNAg.jpeg
 

Users who are viewing this thread

Top